Tri-Shutter Card Tutorial


Pin It Now!
by Bonnie Szwalkiewicz
Copied from Splitcoaststampers.com
Special occasions call for special cards. This one will fit the bill!
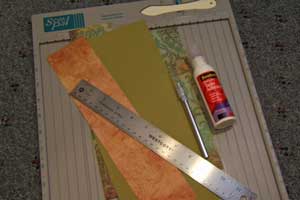
Supplies
One 5 1/2" x 12" piece of card stock
Scor-Pal or other scoring tool
Paper cutter
Patterned paper
Bone folder
Craft knife
Ruler
Adhesive
Step-by-step
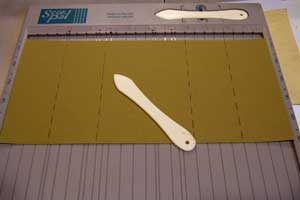
Step 1
Place 5 1/2" x 12" piece of card stock horizontally in your Scor-Pal.
Score at 2" 4" 8" and 10"
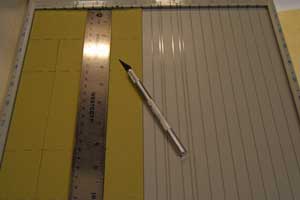
Step 2
Turn card stock a 1/4 turn.
Along the edge measure in 1 1/2".
Make a slit with a craft knife between the score marks at 2" and 10". Repeat on the other long side.
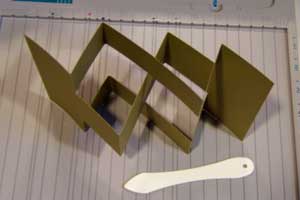
Step 3
Fold as pictured.
Step 4
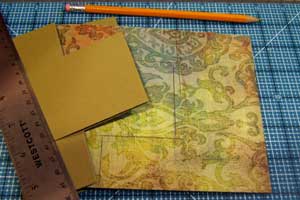
Using card base as a template, trace the section with the T-shaped fold onto patterned paper.
Cut two of this shape.
*Note-I usually skip this step and cut the patterned paper to fit each individual section.
Step 5
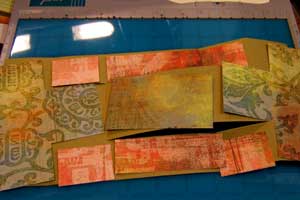
Trim 1/16" from all sides of patterned paper.
Step 6
Cut 4 pieces of patterned paper 1 3/8" x 1 7/8"
Cut 2 pieces of patterned paper 1 3/8" x 3 7/8"
Cut 1 piece of patterned paper 2 3/8" x 3 7/8".
Dry fit all of the pieces, then adhere to card base.
Step 7
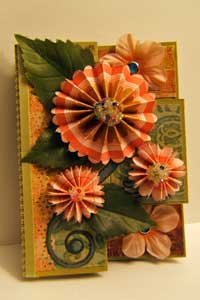
Now that the basic Tri-Shutter card is complete, go forth! Embellish and decorate.
View of the closed card.
No comments:
Post a Comment
I'm constantly striving to improve my blogging and card making skills so I really appreciate any comments/suggestions that you'd like to share. Thank you for stopping by, have a great day!