Gamsol Magic Tutorial
by Cecilia Ross
copied from Splitcoaststampers.com
Blend the color with the side of your stump, pulling the color towards the outer edges in a small circular motion.
HINT: This works best if you have a small plastic bottle with a dauber lid (like a bingo marker) or a small piece of felt soaked in Gamsol. Press the stump against the felt or the dauber top to dampen.
Always start with the lighter colors first like the skin, goose and puddle.
To shade, add darker color around edges, in creases and anywhere a shadow would be.
Highlights should be added with a lighter color or simply by removing color with an eraser.

Pin It Now!
by Cecilia Ross
copied from Splitcoaststampers.com
Use colored pencils, odorless mineral spirits, and blending stumps to color a masterpiece.
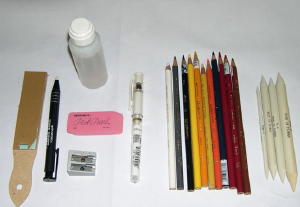
SUPPLIES
- Prismacolor™ Pencils or other wax-based colored pencils
- Blending stumps in various sizes
- Gamsol or other artist-grade odorless mineral spirits
- Emery board or sanding block to sharpen stumps
- Soft eraser
- Metal pencil sharpener
- Neutral colored cardstock
- Outline stamp
- Dye based ink
Step-by-Step
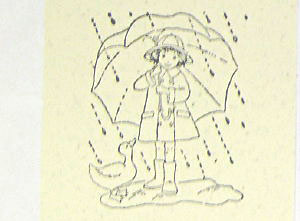
Step 1
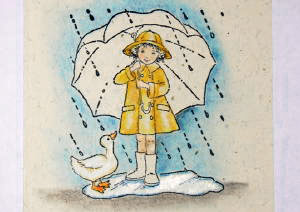
Ink stamp with dye based ink and stamp image on neutral cardstock.
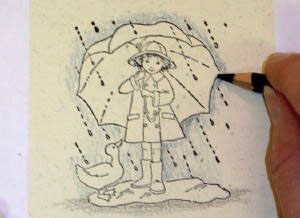
Step 2
Start coloring the image background (usually sky and ground) with a pencil, applying a light amount of color close to the edge of your image. I used Copenhagen Blue.
Step 3
Blend the color with the side of your stump, pulling the color towards the outer edges in a small circular motion.
HINT: This works best if you have a small plastic bottle with a dauber lid (like a bingo marker) or a small piece of felt soaked in Gamsol. Press the stump against the felt or the dauber top to dampen.
Dampen the tip of your stump with Gamsol.
Step 4
Always start with the lighter colors first like the skin, goose and puddle.
Continue coloring and blending the inside images as in Steps 3 and 4.
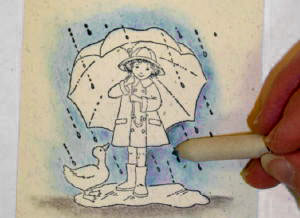
Step 5
To shade, add darker color around edges, in creases and anywhere a shadow would be.
Highlights should be added with a lighter color or simply by removing color with an eraser.
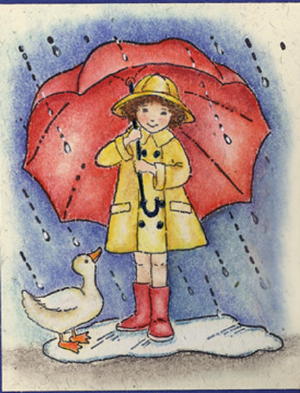
Once all of the base colors are in, go back and add some shading or highlights.
Step 6
Now put the card together. There is no need to seal the image. Gamsol sets the colors so there's no worry about smudging.
No comments:
Post a Comment
I'm constantly striving to improve my blogging and card making skills so I really appreciate any comments/suggestions that you'd like to share. Thank you for stopping by, have a great day!