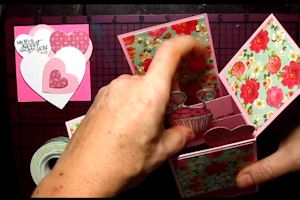
Pop-Up Box Card
by Dina Kowal
copied from Splitcoaststampers.com
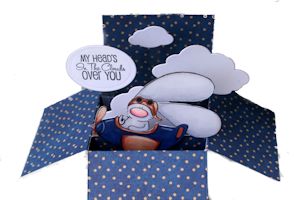
Tuck a surprise inside a box-shaped pop-up card! Many thanks to Monica Gale for her inspiration.
Supplies
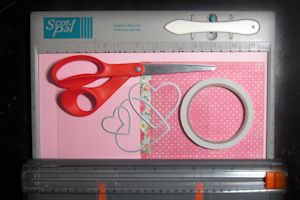
12" x 12" card stock
Coordinating patterned paper
Adhesive
Die cuts, Quickutz heart dies used here
Acetate, cut into narrow strips (optional)
Scoring tool
Paper trimmer
Stamps
Step-by-step
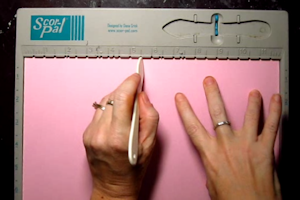
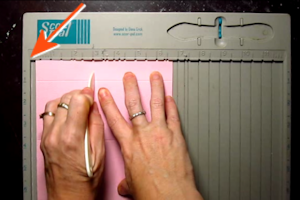
Step 1
Cut card stock to 8 1/2" x 12" . Score on the long side at 2 3/4", 5 1/2", 8 1/4", and 11"
Hint:
For scoring boards not marked at quarter inches, score at 5 1/2" and 11" first. Move the card stock 1/4" to the right, then score the other lines at 3" and 8 1/2".
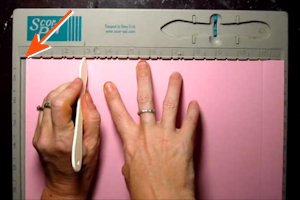
Step 2
Cut off a 2" x 12" strip, and set it aside. This will be used later.
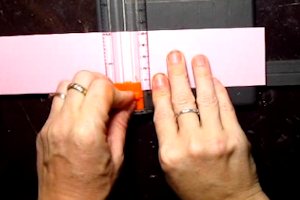
Step 3
Turn the 6 1/2" x 12" panel a quarter turn to the left, and score at 2 3/4".
Hint:
For scoring boards not marked at quarter inches, move the card stock one quarter turn to the right, then score at 3"
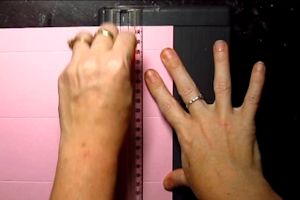
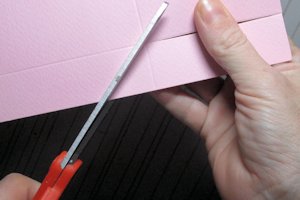
Step 4
Cut down 2 3/4" to this score line along each of the 4 perpendicular score lines.
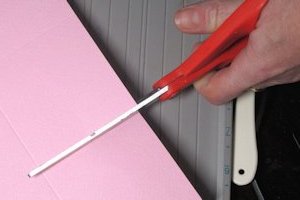
At the 11" score line, cut in at a slight angle up from the edge of the card stock to remove the excess above the score line and create a tab.
Step 5
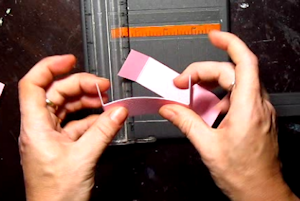
Cut the 2" x 12" strip at 4 1/4" from the end wit the 1" score line. Cut the strip in half the long way to create two strips 1" x 4 3/4"
Both strips should be scored in 1" from each end. Fold both tabs back.
Step 6
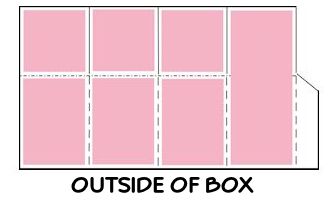
Cut patterned paper to decorate each panel, as follows:
1 inside back panel - 2 1/2" x 6 1/4"
3 lower panels (outside only) - 2 1/2" x 3 1/2"
6 upper panels (side and front, inside and outside) - 2 1/2" square
Cut one 2 1/2" x 6 1/4" outside back panel from white card stock.
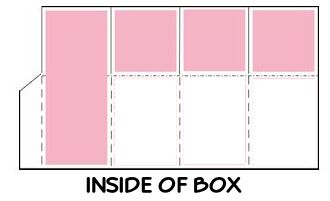
Center and adhere each panel as indicated above.
Hint:
Attach the longest decorative panels to the section next to the tab.
Step 7
Fold the decorated card on the 5 1/5" score line, and attach the tab inside with adhesive.

Step 8
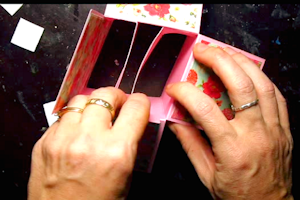
Apply adhesive to the end tabs of the 1" x 4 3/4" strips, and adhere them to the inside of the opened box, aligning them with the top of the opening. Turning both tabs toward the outside front or back of the box will help ensure straight placement.
Hint:
Close the box in both directions and secure the score lines to ensure that it will lie flat for mailing.
Step 9
Adhere die cuts, stamped images, and/or other embellishments to the strips and inside front and back of the card. Stick them down lightly at first, as they may need to be repositioned, inside elements should be placed so they are not seen when the card is closed.
Hint:
A 3" square sticky note is the appropriate size of the visible area to be decorated, and can be used as a template to plan the arrangement of the die cuts and other inside elements.
Smaller die cuts can be attached to 3 1/5" strips of clear acetate. These will wave slightly when the card is opened.

Step 10
Embellish the inside front flap if desired.

Step 11
Complete the project.
Note:
Finished card fits in a 6" x 9" envelope. Measurements for A2 size cards are listed below:
Variations
For a standard A2 card (vertical): cut card stock to 7 1/2" x 9 1/4". Score at 2 1/8", 4 1/4", 6 3/8" and 8 1/2". Rotate the card stock to the left. Cut off 2" as above. Cut the 2" strip at 3 5/8" and cut in half lengthwise as above for the inside tabs. On the card base, score at 2 1/2" and cut down to the score lines. Assemble as above.
Patterned paper are as follows:
5 1/4" x 2" - one patterned and one white/neutral for the back.
1 7/8" x 2 1/4" - six of these.
2 3/4" x 1 7/8" - three of these.

For a standard A2 card (horizontal): Cut card stock to 6 1/4" x 12". Score at 2 3/4", 5 1/2", 8 1/4", and 11". Rotate the card stock to the left. Cut off 2" as above. Cut the 2" strip at 4 3/4" and cut in half lengthwise as above for inside tabs. On the card base, score at 2" and cut down to the score lines. Assemble as above.
Pin It Now!
by Dina Kowal
copied from Splitcoaststampers.com
Tuck a surprise inside a box-shaped pop-up card! Many thanks to Monica Gale for her inspiration.
Supplies
12" x 12" card stock
Coordinating patterned paper
Adhesive
Die cuts, Quickutz heart dies used here
Acetate, cut into narrow strips (optional)
Scoring tool
Paper trimmer
Stamps
Step-by-step
Step 1
Cut card stock to 8 1/2" x 12" . Score on the long side at 2 3/4", 5 1/2", 8 1/4", and 11"
Hint:
For scoring boards not marked at quarter inches, score at 5 1/2" and 11" first. Move the card stock 1/4" to the right, then score the other lines at 3" and 8 1/2".
Step 2
Cut off a 2" x 12" strip, and set it aside. This will be used later.
Step 3
Turn the 6 1/2" x 12" panel a quarter turn to the left, and score at 2 3/4".
Hint:
For scoring boards not marked at quarter inches, move the card stock one quarter turn to the right, then score at 3"
Step 4
Cut down 2 3/4" to this score line along each of the 4 perpendicular score lines.
At the 11" score line, cut in at a slight angle up from the edge of the card stock to remove the excess above the score line and create a tab.
Step 5
Cut the 2" x 12" strip at 4 1/4" from the end wit the 1" score line. Cut the strip in half the long way to create two strips 1" x 4 3/4"
Both strips should be scored in 1" from each end. Fold both tabs back.
Step 6
Cut patterned paper to decorate each panel, as follows:
1 inside back panel - 2 1/2" x 6 1/4"
3 lower panels (outside only) - 2 1/2" x 3 1/2"
6 upper panels (side and front, inside and outside) - 2 1/2" square
Cut one 2 1/2" x 6 1/4" outside back panel from white card stock.
Center and adhere each panel as indicated above.
Hint:
Attach the longest decorative panels to the section next to the tab.
Step 7
Fold the decorated card on the 5 1/5" score line, and attach the tab inside with adhesive.
Step 8
Apply adhesive to the end tabs of the 1" x 4 3/4" strips, and adhere them to the inside of the opened box, aligning them with the top of the opening. Turning both tabs toward the outside front or back of the box will help ensure straight placement.
Hint:
Close the box in both directions and secure the score lines to ensure that it will lie flat for mailing.
Step 9
Adhere die cuts, stamped images, and/or other embellishments to the strips and inside front and back of the card. Stick them down lightly at first, as they may need to be repositioned, inside elements should be placed so they are not seen when the card is closed.
Hint:
A 3" square sticky note is the appropriate size of the visible area to be decorated, and can be used as a template to plan the arrangement of the die cuts and other inside elements.
Smaller die cuts can be attached to 3 1/5" strips of clear acetate. These will wave slightly when the card is opened.
Step 10
Embellish the inside front flap if desired.
Step 11
Complete the project.
Note:
Finished card fits in a 6" x 9" envelope. Measurements for A2 size cards are listed below:
Variations
For a standard A2 card (vertical): cut card stock to 7 1/2" x 9 1/4". Score at 2 1/8", 4 1/4", 6 3/8" and 8 1/2". Rotate the card stock to the left. Cut off 2" as above. Cut the 2" strip at 3 5/8" and cut in half lengthwise as above for the inside tabs. On the card base, score at 2 1/2" and cut down to the score lines. Assemble as above.
Patterned paper are as follows:
5 1/4" x 2" - one patterned and one white/neutral for the back.
1 7/8" x 2 1/4" - six of these.
2 3/4" x 1 7/8" - three of these.
For a standard A2 card (horizontal): Cut card stock to 6 1/4" x 12". Score at 2 3/4", 5 1/2", 8 1/4", and 11". Rotate the card stock to the left. Cut off 2" as above. Cut the 2" strip at 4 3/4" and cut in half lengthwise as above for inside tabs. On the card base, score at 2" and cut down to the score lines. Assemble as above.
No comments:
Post a Comment
I'm constantly striving to improve my blogging and card making skills so I really appreciate any comments/suggestions that you'd like to share. Thank you for stopping by, have a great day!